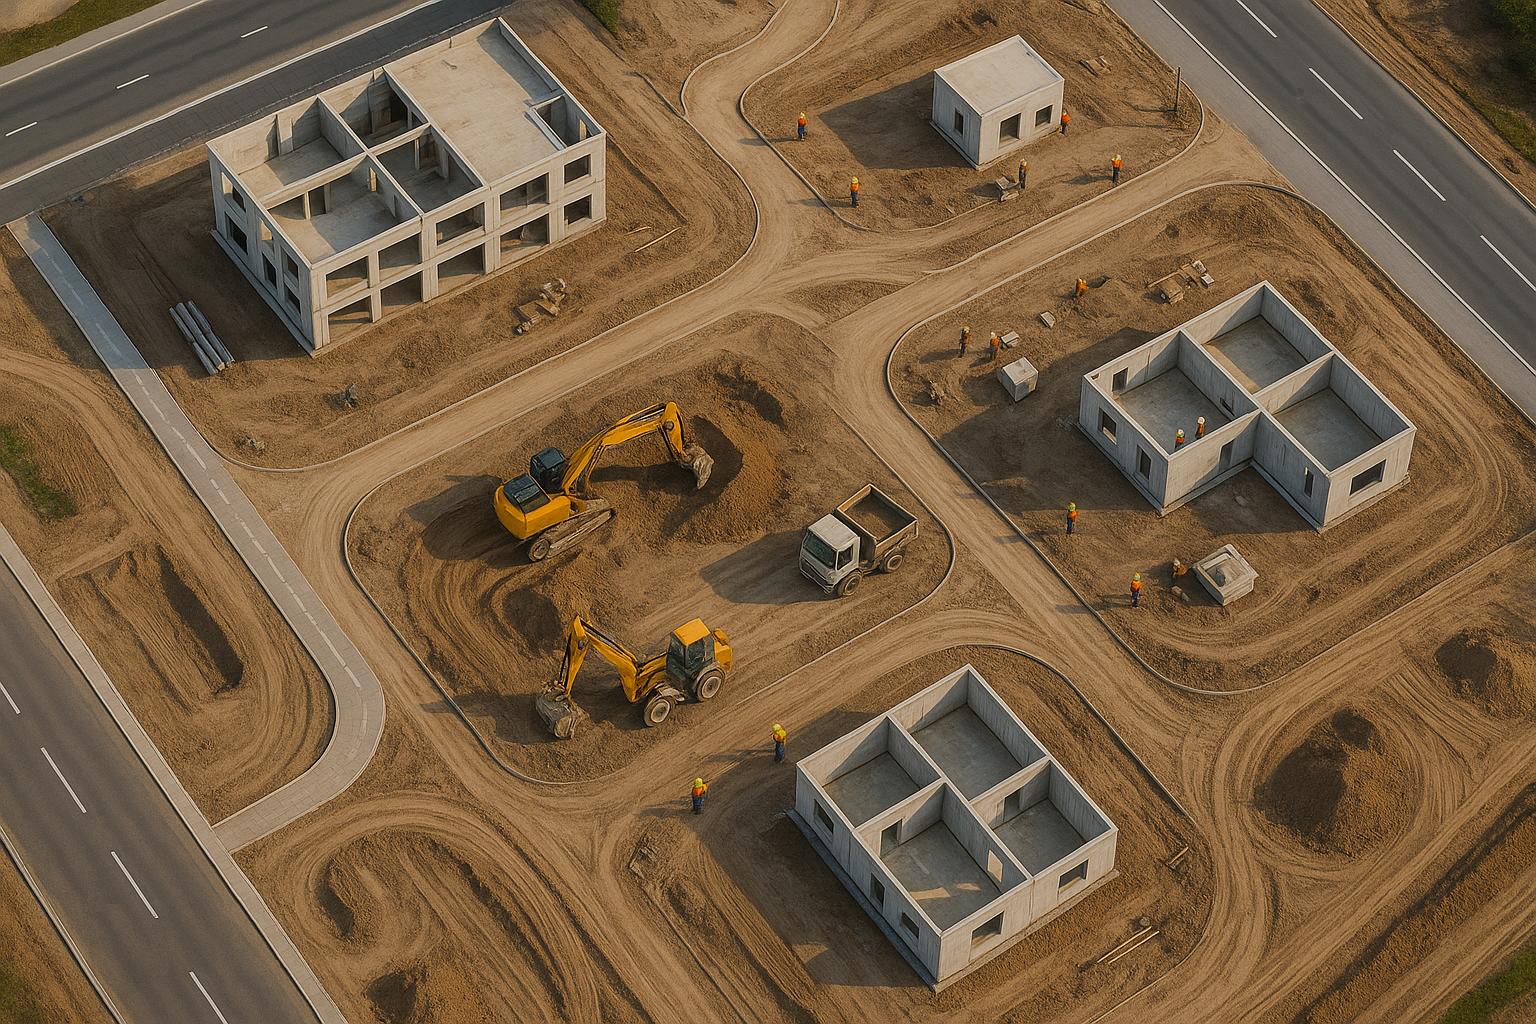
Drone orthomosaic mapping is transforming construction workflows by delivering precise, top-down aerial maps that are distortion-free and accurate to the centimeter. These maps streamline progress tracking, volume calculations, and regulatory compliance while saving time, reducing costs, and improving safety. Here's a quick breakdown of the key steps:
- Plan Ahead: Ensure FAA compliance, register your drone, and use tools like LAANC for airspace authorization. Prepare your equipment and choose RTK/PPK-enabled drones for higher accuracy.
- Flight Prep: Use flight planning software to set grid patterns and overlap percentages (75% frontal, 60% side). Pick calm weather and configure camera settings for consistent image quality.
- Ground Control Points (GCPs): Place 5+ GCPs across the site for accuracy. Use high-contrast markers and record precise GPS coordinates.
- Data Collection: Fly at consistent altitudes (15–35 meters) with a 90° camera angle. Monitor flights closely and capture high-quality images.
- Data Processing: Use photogrammetry software to stitch images into an orthomosaic. Input GCPs, validate accuracy, and correct any errors.
- Review & Share: Verify accuracy using checkpoints, then host and analyze maps on platforms like Anvil Labs for collaboration and real-time progress tracking.
Drone Mapping for Construction: Complete Guide
Pre-Flight Planning and Preparation
To ensure a smooth and compliant mapping operation, follow these steps carefully before taking off.
Legal Requirements
Before launching a drone, make sure you're fully compliant with FAA regulations. If you're flying for commercial purposes, you'll need an FAA Part 107 Remote Pilot Certificate. This requires passing a knowledge test covering topics like airspace rules, weather conditions, emergency procedures, and safe drone operation. Keep in mind, this certification must be renewed every 24 months.
Drones weighing more than 0.55 pounds (250 grams) must be registered, with a unique registration number displayed on the aircraft. For drones exceeding 55 pounds, a paper registration is required. Additionally, all registered drones must comply with Remote ID regulations, which allow for identification and tracking.
Airspace authorization depends on your flight location. In controlled airspace, you'll need pre-flight approval from the FAA. Use LAANC (Low Altitude Authorization and Notification Capability) applications to get near-real-time authorization for pre-approved altitudes. For areas outside LAANC coverage or near airports, submit your request through FAA DroneZone at least 60 days in advance.
To stay informed about airspace restrictions, use tools like the FAA's B4UFLY Mobile App or AirMap. These resources provide real-time maps, highlight restricted zones, and notify you of Temporary Flight Restrictions (TFRs). Always maintain a clear Visual Line of Sight (VLOS) and avoid flying near airports. If you're planning night operations, equip your drone with anti-collision lighting visible for at least three statute miles and complete the necessary pilot training.
When collecting data, respect local privacy laws. Encrypt and securely store information, ensuring access is limited to authorized personnel. If your drone activities might impact the privacy of nearby businesses or residents, notify them in advance.
Once all legal requirements are met, turn your attention to preparing your equipment for a successful mission.
Equipment Setup
Choosing the right drone and camera is crucial for high-quality survey results. For precise positioning, consider drones equipped with RTK (Real-Time Kinematic) or PPK (Post-Processed Kinematic) technology.
Before takeoff, ensure the drone locks onto at least 10-12 satellites for accurate positioning. Fully charge all batteries and bring spares for longer flights.
Conduct essential pre-flight checks, including:
- Inspecting propellers for wear or damage
- Ensuring the camera gimbal moves freely
- Verifying memory cards have ample storage
- Testing all sensors to confirm they're functioning properly
Pack extra supplies like spare propellers, memory cards, and lens cleaning tools to handle minor issues, especially in demanding environments like construction sites.
With your equipment ready, move on to planning your flight and evaluating weather conditions.
Flight Planning and Weather Assessment
Leverage flight planning software to simplify mission setup and ensure complete coverage of your target area. These tools are especially helpful for creating efficient grid patterns, such as "lawnmower" flight paths.
Set your flight altitude above ground level (AGL) based on the map resolution you need. For construction sites, adjust overlap settings accordingly: use 75% frontal and 60% side overlap for standard conditions, and increase to at least 85% overlap in areas with dense vegetation or intricate structures. For more detailed mapping, double grid patterns with 75/75 overlap and a 70-degree camera tilt are often used.
Choose calm weather for your flights. Avoid strong winds, heavy rain, or harsh midday sunlight, as these conditions can compromise image clarity. Early morning or late afternoon flights are ideal for softer shadows and better lighting.
Finally, configure your camera settings - resolution, format, shutter speed, and ISO - to maintain consistent image quality. Keep the camera angle and altitude steady throughout the flight, and avoid capturing unnecessary views during takeoff, landing, or sharp turns, as these can distort your imagery.
Data Collection Best Practices
Once your flight plan is ready, it’s time to execute the mission and capture high-quality images for your orthomosaic.
Flight Execution
Start by uploading your flight plan and conducting final pre-flight checks. These include verifying the GPS signal, checking battery levels, ensuring sufficient storage capacity, and confirming stable weather conditions. During the flight, monitor the drone's progress using your ground station.
Stay vigilant for unexpected changes, like shifting weather, obstacles, or system alerts that might demand immediate action. Always keep the drone within your line of sight, as required by FAA regulations. Position yourself in a spot where you can clearly observe the entire flight path and identify a secondary landing zone in case of emergencies. These precautions help maintain the precision needed for orthomosaic mapping in construction projects.
Camera Settings and Image Quality
Before takeoff, set your flight parameters to maintain consistent data quality. For mapping construction sites, aim for a 75% frontal overlap and 60% side overlap as a baseline. If the area includes complex structures, tall buildings, or dense equipment, increase the overlap to at least 85% in both directions to ensure detailed image stitching.
Choose your flight altitude based on the resolution required. Lower altitudes, typically between 15 and 35 meters (50 to 115 feet), provide sharper images but may extend the mission time due to additional flight lines. Keep the altitude consistent throughout the flight to maintain a uniform ground sampling distance (GSD).
Adjust the camera settings to match the lighting conditions. For RGB cameras, set exposure times between 0.8 and 1.1 milliseconds to balance image clarity and avoid overexposure. Modify aperture and ISO settings as needed to ensure consistent white balance, especially in changing light.
Opt for overcast conditions when possible, as they reduce glare and harsh shadows that can complicate image processing. If flying on a sunny day is unavoidable, plan the flight around noon when the sun is highest to minimize shadow interference.
Point the camera straight down at a 90-degree nadir angle to capture images ideal for orthomosaic creation. This perpendicular perspective ensures accurate measurements and seamless alignment during processing. Only capture images during stable flight segments, as angled shots can distort the final map.
Once the imagery is captured, the next step is to set up ground control points for precise validation.
Ground Control Points Setup
Ground Control Points (GCPs) act as geospatial anchors, significantly improving the accuracy of your orthomosaic. Even with RTK or PPK-equipped drones, GCPs provide an extra layer of quality control, reducing positioning errors from meters to just centimeters.
Distribute at least five GCPs across the site - one near each corner and one at the center. For larger or irregularly shaped areas, use a zigzag pattern to ensure even coverage.
Place GCPs on flat, stable surfaces, away from tall structures, heavy equipment, or areas prone to shadows during the flight. Avoid locations near utility poles, parking lots, or steep slopes where GCPs might be damaged or hard to locate. If the site has significant elevation changes, add extra GCPs at both high and low points to minimize distortion.
Use high-contrast markers about 2 feet by 2 feet (0.5m x 0.5m) with matte finishes to prevent glare. Patterns like checkerboards, orange X shapes, or white V shapes work well and remain visible from typical flight altitudes. Ensure each GCP appears in multiple overlapping images - ideally 5 to 6 overlaps - and keep them at least 150 pixels away from the image edges.
Record precise coordinates for every GCP using high-precision GPS or RTK receivers, aiming for sub-3 centimeter horizontal and vertical accuracy for survey-grade results. Document each GCP with three photos: a close-up showing the center point and two wider shots for context.
| Method | Horizontal Accuracy | Vertical Accuracy | Typical Use Case |
|---|---|---|---|
| No GCPs (GPS Only) | ±30–50 cm | ±40–80 cm | Rough visual maps, basic inspections |
| RTK/PPK Only (No GCPs) | ±3–10 cm | ±5–15 cm | Construction layouts, earthwork |
| GCPs + RTK/PPK Combined | ±1–3 cm | ±2–5 cm | Survey-grade topographic mapping |
Even with advanced RTK/PPK technology, using 4 to 5 GCPs for a square mile area adds critical validation and serves as a reliable backup for high-stakes construction projects. Investing in proper GCP setup ensures the accuracy and dependability of your final orthomosaic. With these steps complete, you’re ready to process and review your data for quality control.
sbb-itb-ac6e058
Data Processing and Quality Control
Once you've captured your images and documented ground control points (GCPs), the next step is turning that raw data into a precise, georeferenced orthomosaic. This phase demands careful attention to how the data is handled, the processing settings, and accuracy checks to ensure the final output meets the stringent requirements of construction projects.
Data Transfer and Backup
After completing your flight, transfer all the collected data - images, flight logs, GPS details, and any RTK/PPK positioning files - to two secure storage locations. This redundancy ensures your data is safeguarded against potential loss. On-site, review a sample of the images to ensure they are sharp, correctly exposed, and free from issues like motion blur or lens obstructions.
Take detailed notes about any in-flight challenges, such as wind gusts, lighting changes, or equipment glitches. These records can help explain anomalies during processing and improve future flight planning. Additionally, store all metadata - like GCP coordinates, weather conditions, and equipment settings - alongside your image files. With everything backed up and organized, you're ready to move on to processing and create an accurate georeferenced map.
Orthomosaic Creation Process
Start by importing your images into professional photogrammetry software. Ensure that all camera calibration details and GPS data are transferred correctly. Remove any images that are blurry, poorly exposed, or include too much of the horizon, as these can interfere with the final results.
Set your processing parameters based on the required accuracy. For survey-grade results, choose the highest quality settings, even if it increases processing time. Make sure your coordinate system matches local survey standards, such as the State Plane Coordinate System or UTM zones commonly used in U.S. construction projects.
During the initial alignment phase, input your GCP coordinates and mark each point with pixel-level precision. This step ensures the software can accurately georeference and scale your orthomosaic. Desktop-based photogrammetry software often provides more precise control over this process compared to cloud-based platforms, allowing you to zoom in and fine-tune GCP placement.
Keep an eye on the workflow for any alignment errors, gaps, or distortions in the reconstruction. Problematic areas - like reflective surfaces, dense vegetation, or repetitive patterns such as rooftops - may require extra attention, as they can reduce local accuracy. If issues arise, adjust your settings or exclude problematic images to improve the results.
Accuracy Verification and Measurements
Once the orthomosaic is generated, it's time to verify its accuracy. Use checkpoints - ground reference points collected in the same way as GCPs but not included in the processing phase - to validate the final output. These independent points allow you to compare their real-world locations with their positions in the orthomosaic, providing a clear measure of accuracy.
Spread checkpoints evenly across the project area for a balanced accuracy assessment. The American Society for Photogrammetry and Remote Sensing (ASPRS) offers guidelines for this process, distinguishing between two key accuracy types:
- Relative accuracy: Measures how well features relate to each other within the model.
- Absolute accuracy: Evaluates how well the model aligns with real-world coordinates.
| Accuracy Type | Focus | Typical Performance | Construction Use Case |
|---|---|---|---|
| Relative Accuracy | Internal feature relationships | 1–2× GSD horizontally, 1–3× GSD vertically | Volume calculations, progress monitoring |
| Absolute Accuracy | Real-world positioning | 1–3× GSD horizontally, 1–5× GSD vertically | Site layout, boundary surveys |
For most construction projects, relative accuracy is often more important than absolute accuracy. Tasks like calculating earthwork volumes or measuring building components rely on the internal consistency of measurements. Horizontal accuracy typically ranges from 1–3× the ground sampling distance (GSD), while vertical accuracy is within 1–5× GSD.
Carefully inspect the orthomosaic for any artifacts, seam lines, or distortions that could impact measurements. Features like sharp edges, reflective surfaces, or construction machinery may show reduced accuracy in specific areas. Document these limitations in your project deliverables so end users are aware of any constraints.
Finally, confirm the accuracy of key measurements by comparing distances and areas in the orthomosaic to known site dimensions. For projects needing survey-grade precision, ensure your GCPs were collected with sub-3 centimeter accuracy, as the final orthomosaic cannot exceed the precision of its reference points. This validation step ensures your map meets the necessary standards for construction planning and regulatory requirements.
Hosting and Sharing with Anvil Labs

Once your orthomosaic is verified, it's time to share it with your project team. Anvil Labs provides a tailored platform for hosting and managing construction site data, including orthomosaics, 3D models, and thermal imagery. It turns drone maps into interactive tools that help with precise project monitoring.
File Upload and Management
Uploading your orthomosaic to Anvil Labs is simple, even for the large file sizes typical of high-resolution construction maps. The platform supports various data formats, such as standard orthomosaic outputs from photogrammetry software, along with related files like 3D models, LiDAR point clouds, and 360° photos from the same flight.
You can group related datasets - such as those from the same flight date - and include metadata, accuracy reports, and GCP documentation. This ensures all stakeholders have access to a complete and transparent view of the data, including its quality and any limitations.
Anvil Labs offers two pricing options to suit different needs:
- Asset Viewer: $99 per month for hosting, managing, and collaborating on multiple projects.
- Project Hosting: $49 per project, ideal for single-site mapping efforts.
For teams working with raw drone imagery, there's also an optional data processing service available at $3 per gigapixel to convert raw images into finished orthomosaics.
Once uploaded, your orthomosaic becomes part of a centralized repository accessible across devices. This eliminates issues with outdated site maps and minimizes delays between team members.
From here, you can use the platform's built-in tools to analyze and annotate your orthomosaic, turning it into a powerful decision-making resource.
Analysis and Annotation Features
Anvil Labs takes orthomosaics beyond static images by turning them into interactive analysis tools. With integrated measurement and annotation features, you can evaluate site conditions directly on high-resolution maps, making it easier to pinpoint issues, track progress, and share insights with your team.
The annotation tools allow you to mark defects, highlight concerns, and document progress visually. For complex, multi-building projects, this creates a detailed record that’s invaluable for managing ongoing work.
"Our platform addresses these inefficiencies by integrating drone-based 3D modeling with annotation tools that allow users to analyze site conditions directly within the model. From pinpointing specific defects on structures to managing complex multi-building projects, or planning in rugged terrains, it's designed to streamline workflows, improve accuracy, and support faster decision-making - all with minimal learning curve for the users." - Channing Pear, CEO of Anvil Labs
Measurement tools are built right into the platform, letting you calculate distances and areas directly on the orthomosaic without needing additional software. This is particularly helpful for volume calculations and progress tracking, ensuring accuracy for project planning and billing.
Automated monitoring tools make it easy to compare orthomosaics from different dates, identifying changes or discrepancies without manual effort. This speeds up milestone tracking and helps catch potential delays early, keeping your project on schedule.
Anvil Labs claims to speed up inspections by up to 5x and identify 30% more defects compared to traditional methods. These efficiencies lead to better outcomes and reduce the risk of costly errors.
Data Sharing and Access Control
Collaboration is key, and Anvil Labs ensures your data is both accessible and secure. With granular access controls, you can share your orthomosaic with specific stakeholders while keeping sensitive data protected.
The platform is accessible across devices, so team members can view orthomosaics on desktops, tablets, or smartphones without needing specialized software. Field teams can use mobile devices to access detailed site maps, while office staff can work with the same up-to-date data on larger screens.
Integration options enhance the platform’s functionality. For example, you can link orthomosaics with Matterport for interior 3D scans, embed related video content from YouTube, or connect with AI analysis tools and task management systems. These integrations streamline workflows and add more context to your project data.
For remote inspections, Anvil Labs reduces the need for frequent site visits. High-resolution orthomosaics allow teams to perform roof and facade assessments remotely, with annotations and measurements shared instantly. This approach can cut inspection costs by up to 75% while maintaining - or even improving - quality.
The platform also supports real-time collaboration. Changes or annotations made by one team member are immediately visible to others, enabling quick decisions and minimizing communication delays. Access logs track who views or modifies project data, providing a reliable audit trail for compliance or resolving disputes.
Summary and Key Steps
Mastering drone orthomosaic mapping requires careful planning, accurate data collection, efficient processing, and seamless sharing to produce high-quality results.
Complete Checklist Review
The foundation of effective orthomosaic mapping lies in thorough pre-flight preparation. This starts with defining clear project goals, ensuring FAA compliance, and selecting the right equipment - such as RTK GPS for precision. As mentioned earlier, strategically placed Ground Control Points play a critical role in achieving accurate georectification.
Once the data is collected, processing and quality control turn raw imagery into actionable maps. Tools like DJI Terra, DroneDeploy, or Pix4D are essential for stitching individual images into a cohesive map. During this process, orthorectification corrects for factors like perspective, camera tilt, lens distortion, and terrain variations, ensuring consistent scale and precise measurements.
To maximize the value of orthomosaics, hosting and analyzing them on platforms like Anvil Labs transforms static maps into dynamic tools. These platforms allow for integrated measurements, annotations, and automated monitoring, turning orthomosaics into powerful resources for real-time tracking and informed decision-making.
"Orthomosaics are the cornerstone of drone mapping. These high-resolution, geo-corrected maps are used across the construction industry to verify work progress, guide layout and support project documentation." - DroneDeploy
By following these steps, teams can streamline workflows and achieve tangible improvements in project outcomes.
Implementation Recommendations
Expanding on the checklist, standardizing drone mapping practices can significantly boost both efficiency and accuracy on construction sites. Drone orthomosaic mapping should become a routine part of construction workflows rather than an occasional tool. Regular orthomosaic updates allow teams to track progress, verify subcontractor work, and identify potential delays early in the process.
The benefits of consistent drone mapping are clear. Drone-based inspections can cut costs by as much as 50% compared to traditional methods, while mapping software can reduce documentation time by half. For instance, a 15-minute drone flight has been shown to save five man-hours compared to manual inspections, and catching discrepancies early has helped many projects avoid costly six-figure change orders.
Integrated platforms amplify these benefits. Anvil Labs, for example, processes drone data within 72 hours, reducing inspection costs by up to 75% through streamlined, automated workflows. Its AI-powered features detect site anomalies and track progress in real time, enabling faster and more informed decisions. A centralized platform also fosters better communication and accountability among stakeholders, offering clear insights into project progress. Teams using Anvil Labs report achieving ROI within two months, with inspections that are 75% faster and capable of identifying 30% more defects than traditional methods.
The shift toward automated, high-accuracy aerial imagery represents a major advancement over manual total station measurements and infrequent satellite updates. Construction professionals embracing this technology now position themselves ahead of the curve, benefiting from greater efficiency, precision, and project success.
FAQs
What legal requirements should I know for using drones in construction orthomosaic mapping, and how can I stay compliant?
To legally use drones for construction orthomosaic mapping in the U.S., you’ll need a FAA Part 107 Remote Pilot Certificate. Additionally, your drone must be registered unless it weighs less than 0.55 pounds. Operators are required to follow specific airspace rules, such as keeping flights under 400 feet and steering clear of restricted or controlled areas without prior approval.
It's important to stay up-to-date with any changes to federal, state, and local regulations. Make sure you have the proper certifications, adhere to safety guidelines, and respect privacy laws when collecting site data. These practices not only reduce legal risks but also ensure you maintain high professional standards.
What are Ground Control Points (GCPs), and how can they improve the accuracy of drone orthomosaic maps?
Ground Control Points (GCPs) are carefully surveyed markers placed on the ground to align drone imagery with real-world coordinates. These markers play a key role in correcting distortions and ensuring orthomosaic maps are accurate enough for tasks like construction planning and site analysis.
For optimal results, use 3 to 5 GCPs strategically distributed across the survey area - usually near the corners and the center. Make sure they are easily identifiable in multiple drone images and accurately surveyed before the drone flight. Proper placement of GCPs is critical for producing precise and dependable mapping results.
How does Anvil Labs enhance construction workflows with orthomosaic maps and 3D models?
Anvil Labs transforms construction workflows with its high-resolution orthomosaic maps and 3D models, offering a reliable way to monitor sites, track progress, and manage data in one place. These tools cut down on manual work, enhance measurement precision, and simplify inspections, making project management faster and more efficient.
With features like annotation, measurement tools, and secure data sharing, Anvil Labs promotes seamless collaboration among teams. This not only leads to smarter decision-making but also helps optimize resources, reduce costs, and ensure projects run more smoothly.
