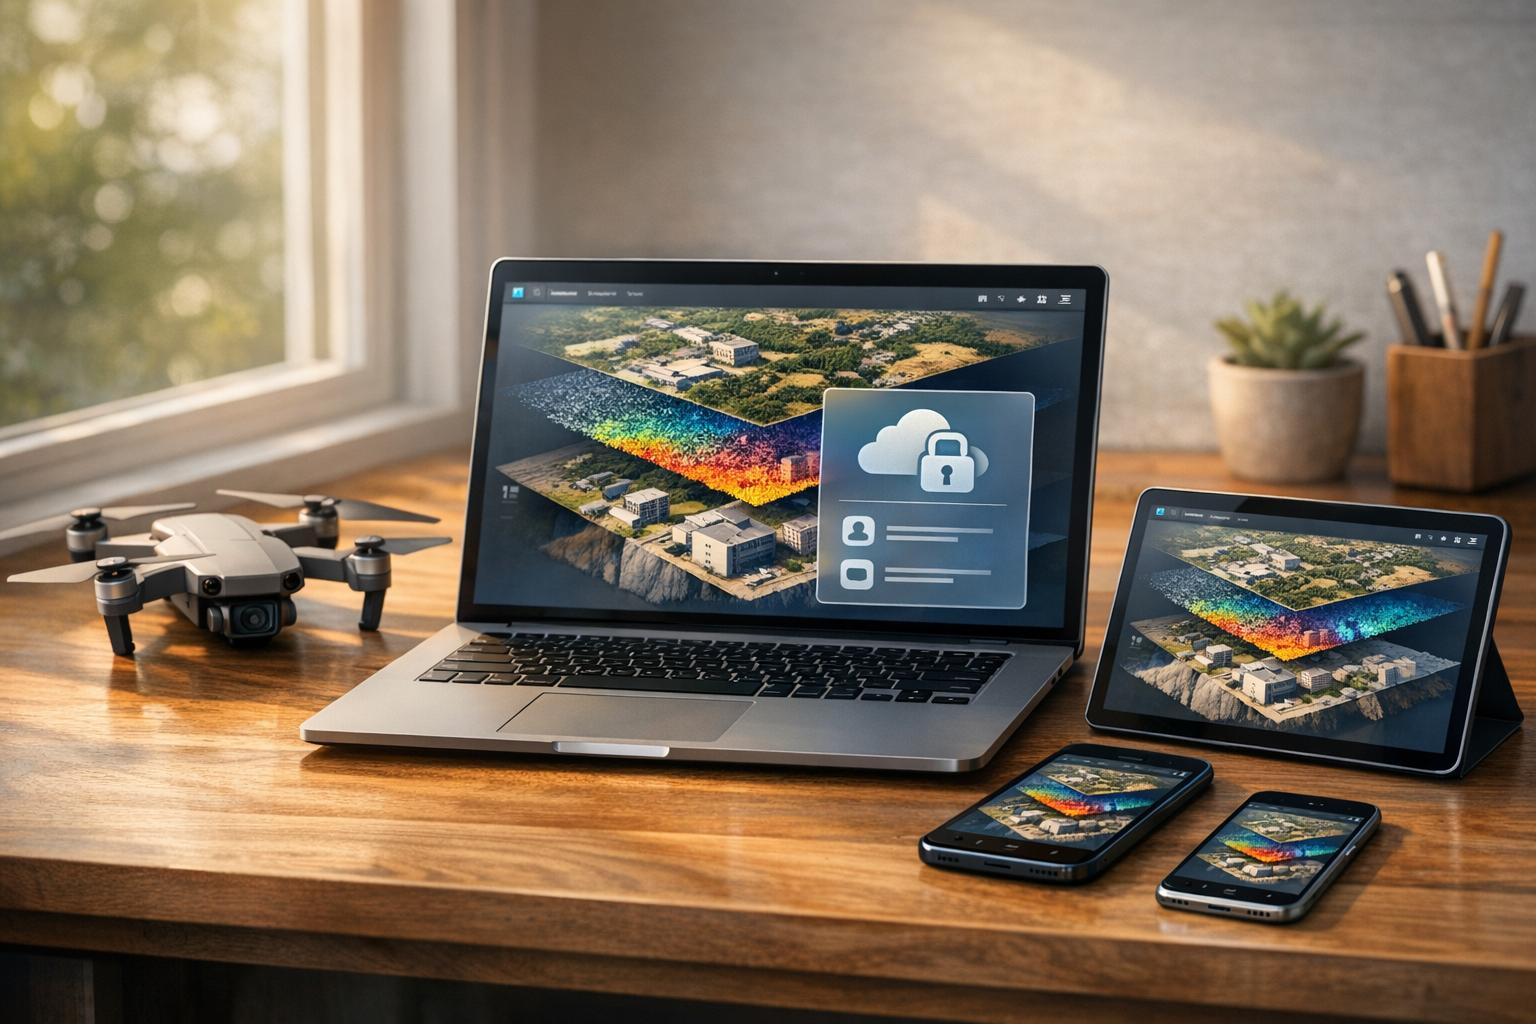
Sharing drone data across platforms is easier than you think - if you use the right tools. The key is to maintain data quality, control costs, and ensure compatibility across file formats. Here's what you need to know:
- Challenges: Data integrity, unpredictable costs, and incompatible formats like
.obj,.laz, and.fbx. - Solution: Platforms like Anvil Labs simplify sharing with browser-based tools, secure access controls, and straightforward pricing ($99/month + $49/project).
- Steps to Share:
- Organize and format data (e.g., use
.lazfor LiDAR). - Upload to Anvil Labs for processing ($3/gigapixel for raw images).
- Set role-based access controls for security.
- Generate shareable links or embed data in external tools (e.g., Matterport, YouTube).
- Organize and format data (e.g., use
With Anvil Labs, inspections are 75% faster, and you can see a return on investment in just two months. Ready to streamline your workflow? Dive into the details below.
Preparing Drone Data for Sharing with Anvil Labs
Organizing and Formatting Drone Data
When preparing drone data for Anvil Labs, start by organizing it into a clear folder hierarchy. Create a parent folder for each project, with subfolders for specific data types like 3D_Models, Orthomosaics, Thermal_Data, and LiDAR. Use a date-based naming format (YYYY-MM-DD) for these folders - e.g., 2026-01-21 - to maintain clarity and order.
Consistency is key when naming files. Include details such as the project name, date, data type, and version. For example: SiteInspection_2026-01-21_Orthomosaic_v1.tif. Anvil Labs supports specific formats, including .obj and .fbx for 3D models and meshes, and .laz for point clouds and LiDAR data. If your LiDAR files are in .las format, convert them to .laz for better compatibility.
For raw images, simply upload them as-is. Anvil Labs handles the heavy lifting, converting these into high-resolution 3D models and orthomosaics at a rate of $3 per gigapixel. This automated process eliminates the need for additional tools, saving you both time and effort.
Before moving forward, double-check that your data is properly organized and formatted, and confirm its integrity to avoid issues later.
Checking Data Accuracy and Quality
Accurate, high-quality data starts with proper sensor calibration. This ensures that geotags and timestamps are precise. After processing, take the time to review photogrammetry and LiDAR outputs to confirm they align with your project’s specifications.
Pay close attention to three critical factors:
- Resolution Consistency: Ensure pixel density is uniform across all tiles.
- Georeferencing Accuracy: Use Ground Control Points (GCPs) or RTK/PPK corrections to confirm proper alignment.
- 3D Model Alignment: Check that there are no gaps or overlaps in point clouds or mesh surfaces.
Anvil Labs provides in-browser measurement tools to help you verify these details after uploading. These tools offer precision with error margins as low as ±0.5%. For thermal imagery, it’s important to preserve radiometric data - keep embedded temperature values intact rather than converting the files to standard RGB. Additionally, during flight planning, ensure sufficient image overlap to create high-quality orthomosaic maps.
Precision Drone Mapping Series - Lesson 4: Sharing via a Web Portal
Step-by-Step Guide to Sharing Data with Anvil Labs
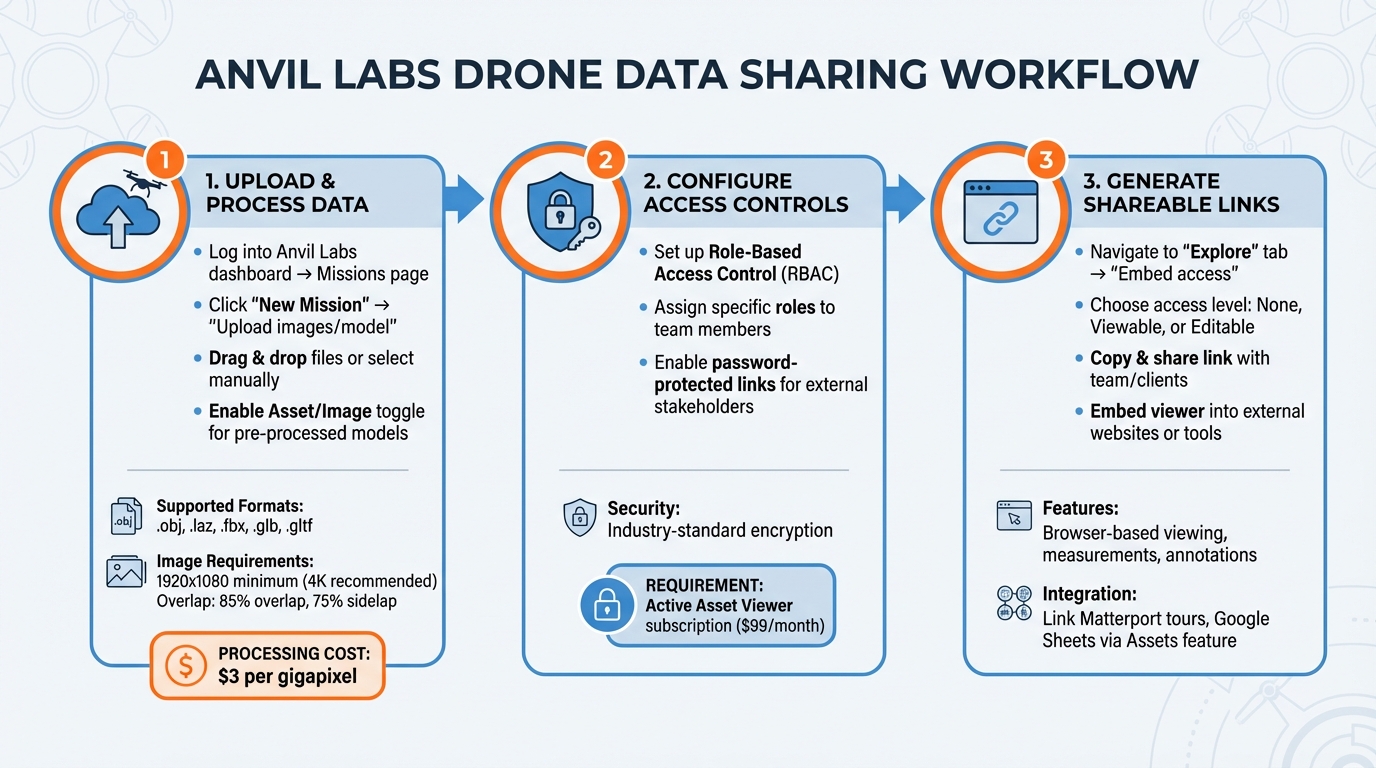
3-Step Process for Sharing Drone Data with Anvil Labs
Step 1: Upload and Process Data
Start by logging into your Anvil Labs dashboard and heading over to the Missions page. From there, click New Mission and choose the Upload images / model option. Fill in a mission name, description, and location to keep things organized.
In the Upload tab, you can either drag and drop your drone footage or click to manually select files from your computer. If you’re uploading a pre-processed 3D model instead of raw images, make sure to enable the Asset / Image toggle. Once your files are ready, click Upload Files and stay on the page until you see a confirmation message. Feel free to open another tab to browse while you wait.
Supported file formats include .obj, .laz, .fbx, .glb, and .gltf. If you're uploading .glb or .gltf, remember to compress them into a .zip file. For the best results, use images with a resolution of at least 1920 x 1080, though 4K is recommended. Aim for an 85% overlap and a 75% sidelap for your images. Anvil Labs will automatically convert your raw images into 3D models and orthomosaics, charging $3 per gigapixel.
After your data is processed, make sure to secure it by setting up access controls.
Step 2: Configure Access Controls
To keep your data safe, Anvil Labs uses Role-Based Access Control (RBAC). This lets you assign specific roles to team members, ensuring they only have access to what’s relevant to their role. All your data is protected with industry-standard encryption, guarding against any unauthorized access.
If you’re sharing data with external stakeholders, you can add extra security by using password-protected links. Just make sure your Asset Viewer subscription ($99/month) is active - if it lapses, all your projects and missions will be temporarily disabled until you renew.
Once your data is secure, you’re ready to create shareable links and embedding options.
Step 3: Generate Shareable Links and Embed Options
Go to the Explore tab within your mission and select Embed access. Here, you’ll find three access levels: None (embed mode disabled), Viewable (anyone with the link can view), and Editable (anyone with the link can view and make changes). Choose the level of access you need.
Copy the link provided and share it with your team or clients. They’ll be able to view and interact with the 3D models, take measurements, and even add annotations - all directly in their browser without needing specialized software. You can also embed the viewer into external websites or project management tools for easy access.
For additional resources like Matterport 3D tours or Google Sheets, use the Assets feature to link external URLs directly to your mission. This keeps all your documentation centralized and easy to find.
sbb-itb-ac6e058
Integrating Drone Data with Third-Party Tools via Anvil Labs
Using Matterport for 3D Visualization
With Anvil Labs, you can seamlessly connect your drone data to Matterport 3D tours for immersive walkthrough experiences. To set this up, head to the Assets section within your Mission Details page. From there, add a new asset and simply paste the URL of your Matterport virtual tour. This creates a direct link between your drone project and the 3D tour, bringing aerial and ground data together in one convenient location.
Once the 3D visualization is in place, you can take things further by embedding this data into other external platforms for a more streamlined workflow.
Embedding Data into YouTube and Task Management Tools
To share drone data more effectively, use the Embed Access tab to generate a shareable link. You can choose between Viewable or Editable access depending on your needs. This link can then be added to platforms like YouTube or task management tools that support iframe embedding. This allows clients or team members to interact with the 3D models directly in their browser - no specialized software required. For even greater efficiency, API integration can automate data uploads and provide mission analytics effortlessly.
Cost-Effective Strategies for Data Sharing Using Anvil Labs
Comparing Anvil Labs Pricing Plans
Anvil Labs offers practical pricing options designed to help drone operators manage costs while maintaining secure and efficient data sharing. Here’s a breakdown of the two main plans available:
| Plan Name | Price | Features | Best For |
|---|---|---|---|
| Asset Viewer | $99/month | Hosting, sharing, collaboration, role-based access control | Ongoing projects with frequent updates and multiple clients |
| Project Hosting | $49/project | Secure storage, sharing, password-protected links | One-off projects or smaller teams with occasional needs |
Both plans allow for optional data processing at $3 per gigapixel to generate high-resolution 3D models or orthomosaics. This straightforward pricing ensures predictable costs, with the $49 per-project fee clearly itemized on client invoices. No hidden charges here - just transparent, manageable expenses.
For those looking to stretch their budget further, there’s a smart workaround: upload pre-processed 3D models in .glb or .gltf formats to completely bypass processing fees. Additionally, you can link external resources like Matterport tours or Google Docs through the Assets feature without incurring extra costs. This flexibility allows you to tailor services to your project’s needs without paying for unnecessary add-ons.
Lee Cormier of Wings of a Dove LLC shares his experience:
"The ROI is clearly marked within the first few uses".
Conclusion
Sharing drone data across platforms doesn’t need to be a hassle - or break the bank. The trick lies in using a centralized system that simplifies uploads, manages access, and creates shareable links. That’s exactly what Anvil Labs delivers. Whether you’re uploading raw imagery or pre-processed 3D models, you can set up access controls to safeguard sensitive information and generate links that work seamlessly in any web browser.
Anvil Labs goes a step further by integrating with other platforms you already use. With the Assets feature, you can connect Matterport tours, Google Docs, or even YouTube videos directly to your missions. Your clients can interact with 3D models - viewing, rotating, and measuring them - right in their browser. And thanks to role-based permissions, you stay in charge of who gets access to what, combining ease of use with top-notch security.
On top of that, Anvil Labs keeps things budget-friendly with straightforward pricing designed to maximize efficiency. You can upload pre-processed .glb files to avoid processing fees, and many users report seeing a return on investment within two months. Inspections are 75% faster, and 30% more defects are identified compared to traditional methods.
With transparent pricing and tools that make managing multiple clients and projects easier, Anvil Labs ensures you can confidently account for every expense.
Ready to simplify your drone data sharing? Visit anvil.so and get started today.
FAQs
How does Anvil Labs ensure drone data works seamlessly across platforms?
Anvil Labs makes sharing and working with drone-generated data a breeze by supporting a variety of file types and converting them into standardized formats that are widely recognized. The platform automatically identifies the file type upon upload, extracts essential metadata - like georeferencing information - and converts it into open formats such as LAS or 3D Tiles.
All assets are displayed in a single, web-based viewer, allowing users to handle mixed-format projects effortlessly without compatibility concerns. Once processed, the data can be exported or securely shared in the desired format, ensuring it remains consistent and ready for use across various platforms.
What are the most cost-effective ways to share drone data using Anvil Labs?
To share drone data with Anvil Labs without breaking the bank, start by exploring their free trial. This allows you to test the platform's features without any upfront commitment. Once you're ready to dive in, their $99/month subscription gives you full access to hosting, management, and collaboration tools - all at a flat, predictable rate.
Want to cut costs further? Try consolidating related datasets into fewer projects to keep one-time hosting fees low. When processing imagery into 3D models or orthomosaics, focus on converting only the most essential data. Another budget-friendly tip is to use Anvil Labs' built-in sharing features, such as password-protected links and role-based access, which eliminate the need for additional third-party tools.
For long-term cost management, store rarely used data on external storage solutions while keeping active projects in Anvil's cloud. This way, you maintain scalability without overspending.
How can I securely share drone data with external stakeholders?
To keep drone data secure during sharing, it’s crucial to protect it at every step. Start by encrypting files - both while they’re stored and when they’re being transferred. This ensures the data stays protected and unreadable to anyone without proper authorization. Implement strong access controls by assigning specific permissions to stakeholders, like view-only or comment-only, and avoid using generic sharing links unless they’re password-protected.
For added security, safeguard shared links with robust passwords and set expiration dates so they automatically become inaccessible after a certain time. Enable activity logging to track who accesses the data and when, and review these logs regularly to spot any suspicious activity. To ensure data integrity, use digital signatures to verify that the files remain unaltered.
Don’t forget to back up your data using the 3-2-1 rule: keep three copies, store them on two different types of media, and maintain one copy off-site. Periodically conduct security audits to evaluate access settings and update encryption keys as necessary. By following these measures, you can share drone data securely while protecting its confidentiality and reliability.
