Drones are reshaping how industrial equipment and sites are documented, making the process safer, faster, and highly precise. By combining drones with advanced photogrammetry software, you can create detailed 3D models for tasks like inspecting equipment, measuring stockpiles, and monitoring project progress. Here's a quick breakdown:
- Key Equipment: RTK-enabled drones for accuracy, caged drones for confined spaces, and VTOL drones for large areas. Sensors like LiDAR and thermal cameras enhance data quality.
- Flight Planning: Use software like DroneDeploy or Pix4Dcapture to plan missions with 75-90% image overlap for maximum detail.
- Data Processing: Tools like Pix4D Mapper and Agisoft Metashape turn drone images into 3D models with centimeter-level precision using GCPs or RTK data.
- Model Management: Platforms like Anvil Labs provide hosting, annotation, and secure sharing options, enabling teams to collaborate effectively.
This approach saves time, reduces risks, and ensures accurate results, making it an essential tool for industries like construction, mining, and manufacturing.
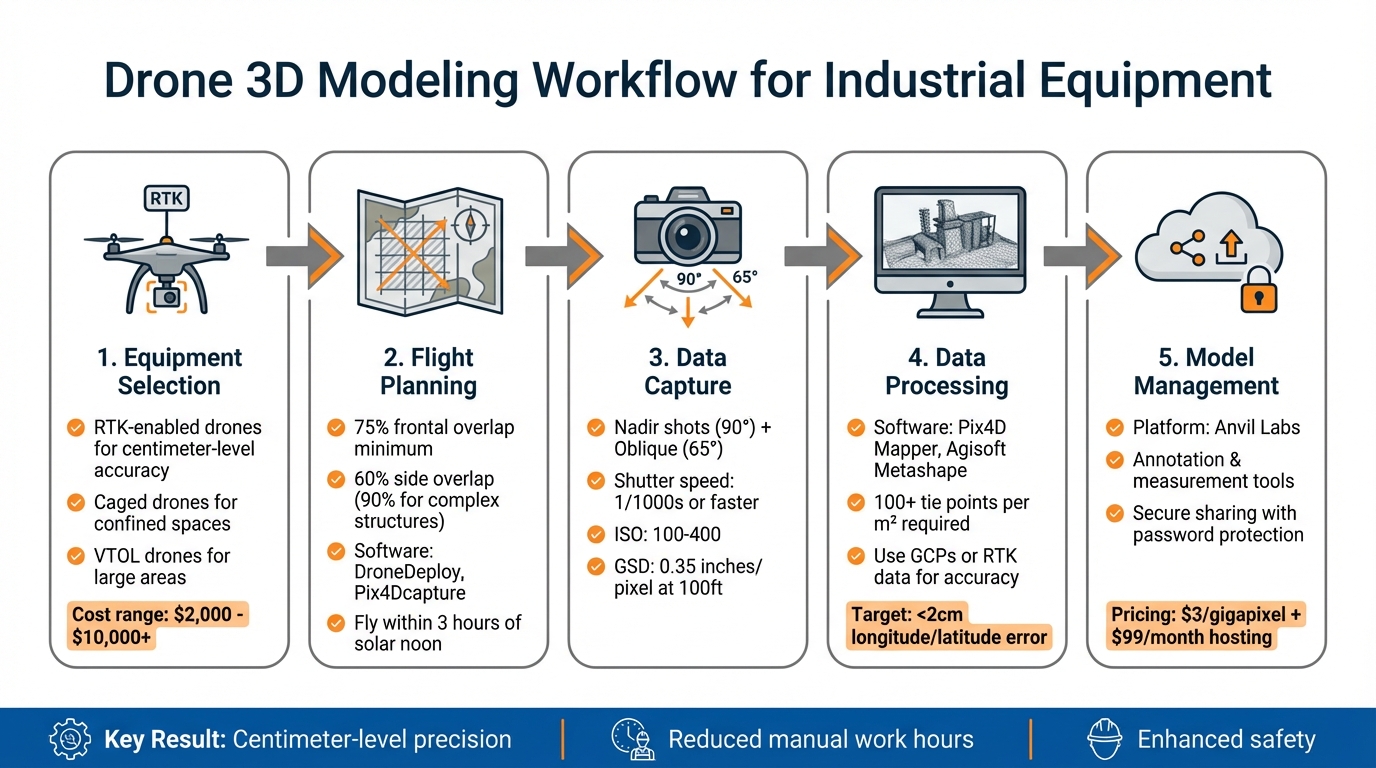
5-Step Drone 3D Modeling Workflow for Industrial Equipment
How to create high quality 3D models with drones? | Hammer Missions
Equipment and Tools You'll Need
Choosing the right tools and techniques is key to efficient industrial site documentation. Costs for mapping equipment can vary widely, from under $2,000 for basic setups to more than $10,000 for high-accuracy models. The price you pay will depend on the level of precision you need and the complexity of the site you're working on.
Drones and Sensors
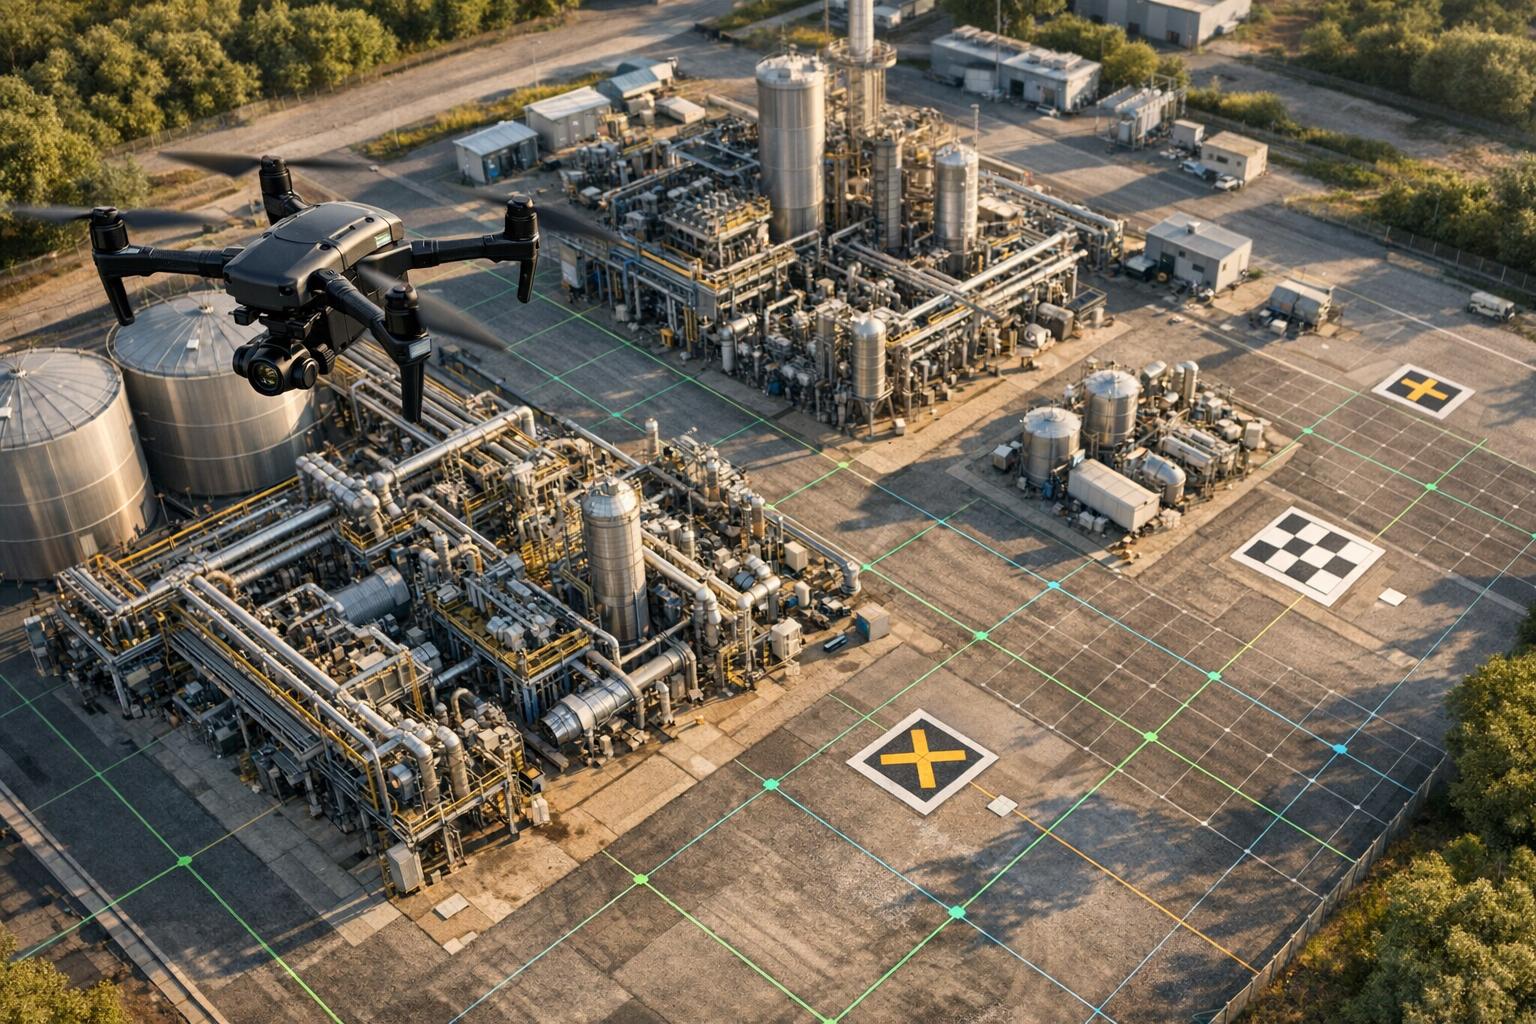
RTK-enabled drones are a must-have for industrial projects, offering centimeter-level positioning accuracy. A popular example is the DJI Phantom 4 RTK, which is well-suited for general site mapping and documenting smaller equipment. These drones excel at capturing detailed imagery from multiple angles with pinpoint accuracy.
For tight, confined spaces like boilers, tanks, or pressure vessels, caged drones such as the Flyability Elios 3 are ideal. These drones are designed to operate in GPS-denied environments. In one instance, the Elios 3 inspected 63 tanks in just two weeks, saving 15,000 manual work hours. Their ability to withstand collisions without crashing makes them perfect for internal inspections.
When tackling large industrial complexes or linear infrastructure projects, VTOL fixed-wing drones like the JOUAV CW-15, CW-25E, and CW-30E offer the best of both worlds: the range of fixed-wing flight and the convenience of vertical takeoff and landing. For example, the CW-25E mapped 30km² in three flights with a ground sampling distance (GSD) of 3cm, achieving vertical accuracy as fine as 1cm.
Camera quality plays a major role in the final model's detail. Multi-lens oblique cameras, particularly those with five lenses, capture data from multiple angles, providing better coverage of vertical surfaces than standard top-down cameras. For specialized needs, additional sensors like LiDAR for precise point clouds, Ultrasonic Thickness sensors for assessing metal integrity, and thermal sensors for spotting heat leaks can be extremely useful.
Supporting Equipment
Ground control points (GCPs) are essential for aligning your model with real-world coordinates and achieving inch-level accuracy. Smart GCPs like AeroPoints simplify the process by automatically recording precise coordinates. Just ensure they’re placed in open areas away from power lines, walls, or trees.
Site rover units are used to record the exact center of each GCP or to create known points on the site, anchoring your model during data processing. Tools like stencils or spray paint can help mark survey points before placing GCPs. Experts emphasize that accurately determining elevation is critical for precise results.
Data storage and power management are equally important. Use high-speed SD cards to handle georeferenced imagery efficiently, and regularly format them using your drone’s flight app to avoid data issues. Dedicated battery chargers for both your drone and its remote controller ensure uninterrupted operations, while gimbal braces protect sensitive camera sensors during transport between sites.
Software for Flight Planning and Processing
Flight planning software makes missions easier by automating tasks like controlling image overlap. Tools such as DroneDeploy, Pix4Dcapture, and WingtraPilot help manage mission automation, terrain following, and overlap settings. For best results, set your camera to Shutter Priority mode with a speed of at least 1/1000 to avoid motion blur, and disable Distortion Correction in the drone settings - post-processing software will handle lens calibration more effectively.
Photogrammetry processing software is where your images come to life as 3D models. Pix4D Mapper and Agisoft Metashape are industry favorites. Pix4D Mapper is ideal for high-precision projects with customizable processing options, while Agisoft Metashape handles a variety of imagery types, including RGB, NIR, thermal, and multispectral. Bentley iTwin Capture is another excellent choice for creating high-quality 3D meshes, especially for large-scale projects and vertical surfaces.
For industrial workflows, platforms like Anvil Labs transform drone images into detailed 3D representations. These platforms include built-in tools for annotations, measurements, and calculations, making them invaluable for decision-making on industrial sites. They also automatically correct for camera tilt and lens distortion, ensuring precise volume and spatial measurements. Before heading out, don’t forget to update your drone firmware and download regional maps to avoid unnecessary delays.
With the right equipment and tools in hand, you're ready to plan and execute precise flight missions to capture the data you need.
Flight Planning and Data Capture
Planning Your Flight Mission
When planning your drone flight, aim for at least 75% frontal overlap and 60% side overlap in your images - or bump it up to 90% overlap for complex or tall structures. This ensures that each point in your project is captured from three unique angles, improving accuracy and detail.
Spread Ground Control Points (GCPs) evenly across your site, positioning them near important features and at least one flight line inward from the project's edge. For visibility in your images, GCP targets should be 5 to 10 times larger than your Ground Sampling Distance (GSD). Wilson Haworth emphasized the importance of precise elevation data, noting that even small errors - just a few inches - can lead to major problems.
The flight pattern you choose depends on your subject. For general areas, use a crosshatch pattern. For buildings, go with a perimeter 3D approach, and for specific equipment, fly orbit or circular missions at multiple altitudes. Before takeoff, calibrate your drone's compass to avoid GPS-related issues that could distort your model. Also, plan flights within three hours of solar noon (or during the summer solstice period above 30° latitude) to minimize shadows. With your plan in place, you’re ready to focus on capturing detailed images.
Capture Techniques for Detailed Models
Capturing both nadir (90°) and oblique (around 65°) images is essential for creating highly detailed models, especially for industrial equipment. Nadir shots give you a clear top-down view, while oblique images capture vertical surfaces and intricate shapes. For automation, set the gimbal to 65°, and for tricky areas, manually adjust to 45°.
Adjust your camera settings to ensure high-quality images. Use a shutter speed of 1/1,000s or faster to avoid motion blur, keep the ISO between 100 and 400 to reduce noise, and set the focus to infinity to maintain sharpness across frames. Avoid capturing the sky or horizon in oblique shots, as this can disrupt stitching during processing. For DJI drones, turn off the "Dewarping" feature to get better results in software like Pix4D.
Your Ground Sampling Distance (GSD) determines the level of detail in your model. Horizontal accuracy usually falls between 1 to 2 times the GSD, while vertical accuracy is about 2 to 3 times the GSD. For instance, flying at 100 feet can produce a GSD as fine as 0.35 inches per pixel, giving you a horizontal accuracy of about 0.8 inches. When working with large vertical structures, fly closer to the object (while staying safe) and perform multiple orbits at varying heights. Maintain 90% overlap between images taken at the same height and 60% overlap between different heights to ensure full coverage. To achieve sub-inch georeferencing without relying heavily on GCPs, consider using RTK/PPK workflows.
sbb-itb-ac6e058
Processing Drone Data into 3D Models
Photogrammetry Workflow
After capturing your images, the next step is turning them into a functional 3D model. Start by creating a new project in your photogrammetry software and importing your raw images. The software will align the images by identifying key points across them, establishing their 3D orientation.
Once the alignment is complete, check the coarse point cloud for any errors. A solid result should have at least 100 tie points per square meter or more than 50,000 tie points per 100 images. If you notice gaps or misalignments, tweak the key point limits (typically between 10,000 and 40,000) or refine the camera calibration settings.
To achieve finer detail, generate a high-density point cloud using MVS algorithms. Set the quality to "High" and apply "Mild" depth filtering. The software will then transform this detailed point cloud into a mesh, or Triangulated Irregular Network. Keep in mind, higher face counts in the mesh improve detail but require more computing power.
For accuracy, incorporate Ground Control Points (GCP) or RTK-GPS data to align your model with real-world coordinates and ensure proper scaling. Once your model is ready, export it in the format that suits your needs - GeoTIFF (.tif) for GIS applications, STL (.stl) for numerical modeling, or KML for Google Earth.
With the initial model created, the next step is refining and cleaning the data for the best results.
Refining and Cleaning Models
Before finalizing your 3D model, it's essential to address any errors or noise. Remove stationary points to eliminate false geometry and unwanted artifacts. If you're working on industrial sites with multiple assets, splitting large point clouds into smaller sections can speed up processing and improve measurement accuracy.
For volume calculations, such as stockpiles or material piles, define a best-fit plane using ground points around the base. Avoid relying on a generic horizontal plane, as it may reduce accuracy.
"The more accurate the survey data is, the better and clearer the 3D model will be." - Chris Patchell, General Manager & Director of Operations, Avian Australia
For intricate industrial equipment, manually adjust areas with low texture or repetitive patterns that the software might struggle with. Many photogrammetry programs also allow Python scripting, which can automate repetitive cleaning tasks and save time. Finally, review the quality report to ensure that the longitude/latitude error remains within 0.8 inches (2 cm) for high-precision projects.
This attention to detail ensures your model is both accurate and ready for practical use.
Managing and Sharing 3D Models with Anvil Labs
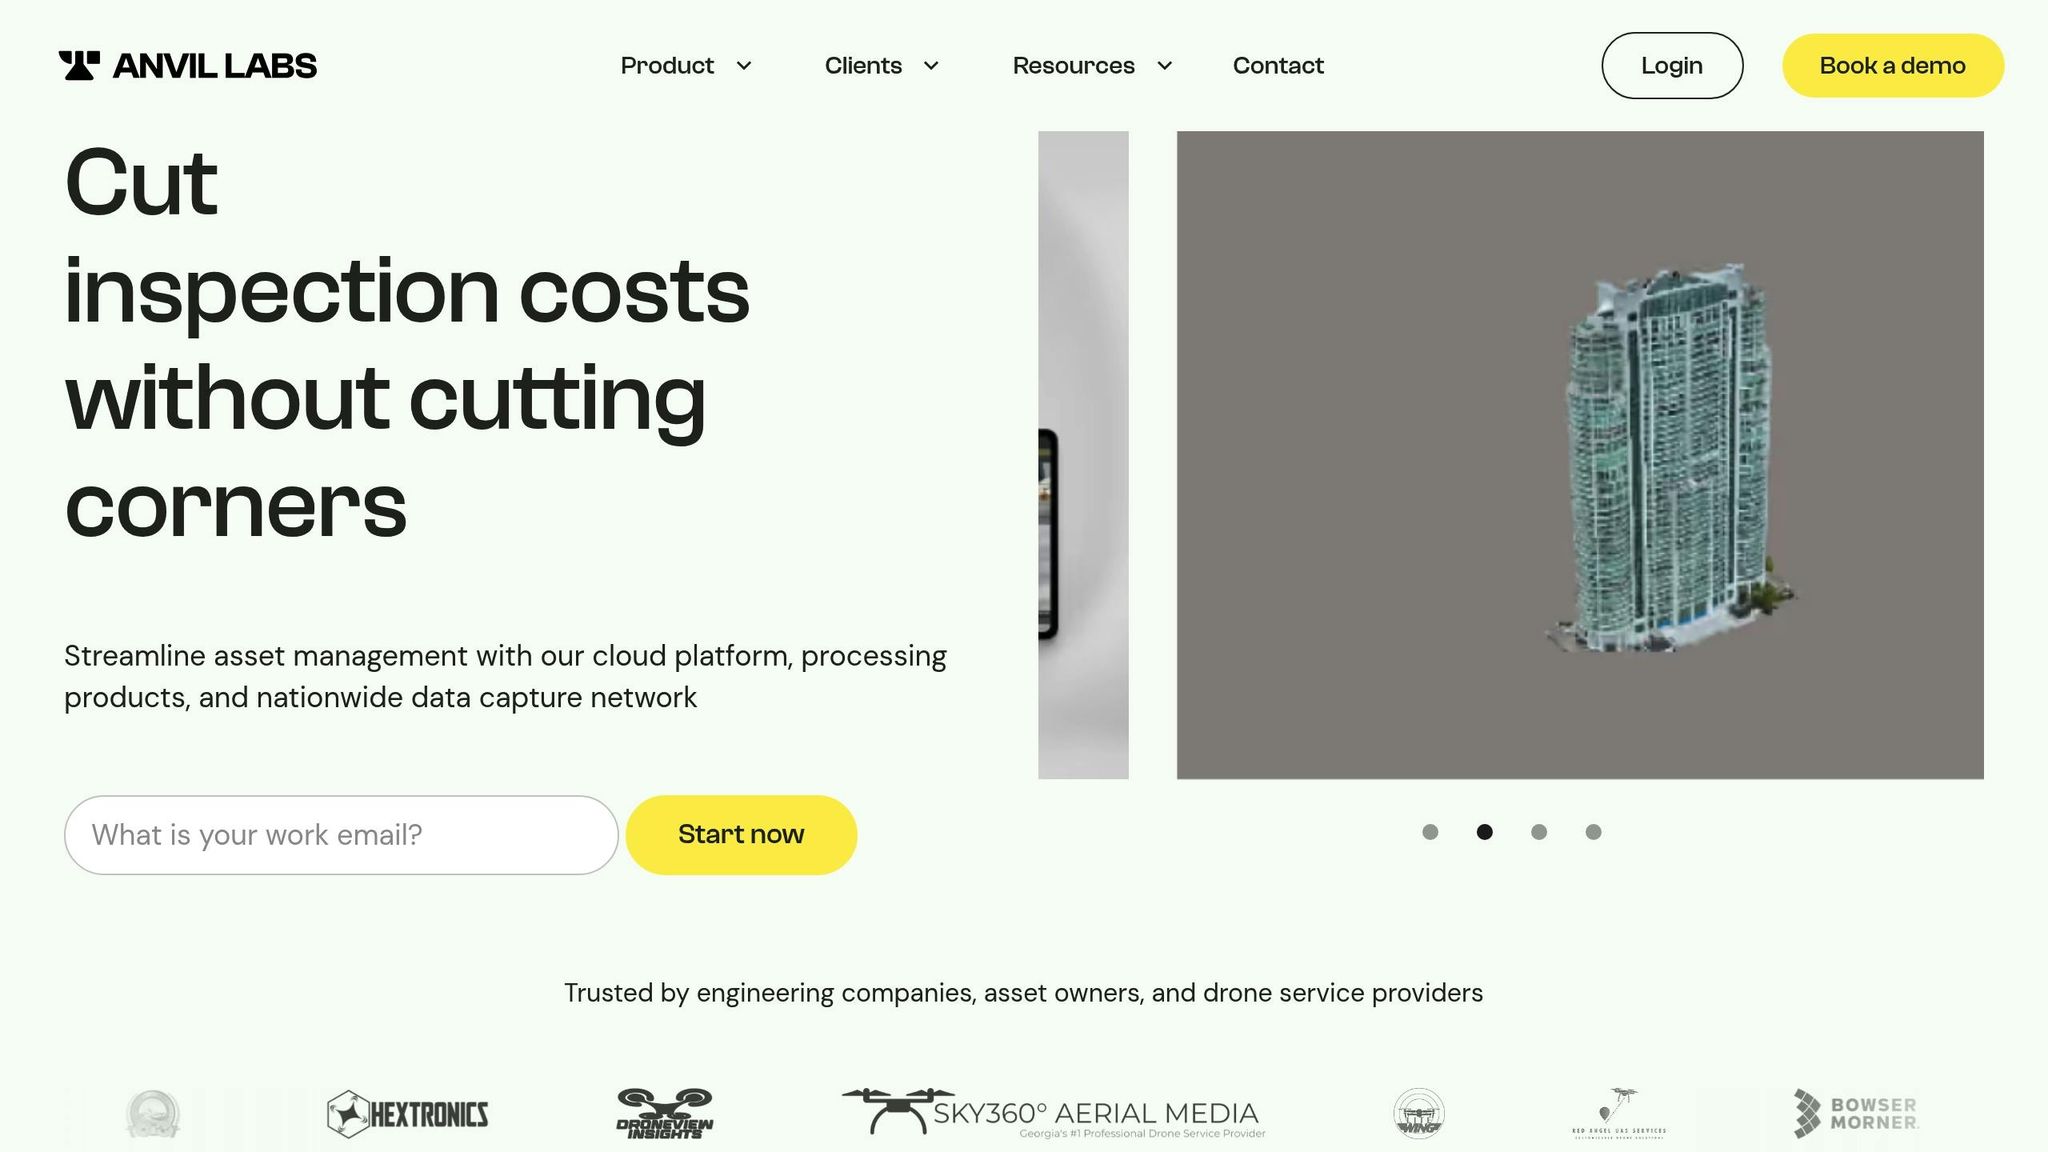
Once your 3D model is polished and ready, the next step is ensuring it's managed and shared efficiently. That’s where Anvil Labs comes in.
Uploading and Hosting 3D Models
With Anvil Labs, you can upload, annotate, and securely share your industrial site data with ease. Supported formats include .obj, .laz, and .fbx, ensuring compatibility with most workflows. Anvil Labs processes raw drone imagery at $3 per gigapixel and offers hosting plans starting at $99/month, with an additional $49 per project fee. This pricing structure works well for industries requiring frequent inspections or facility assessments. Trusted by over 350 companies globally, Anvil Labs has become a go-to solution for managing project files.
Annotation and Measurement Tools
Anvil Labs provides built-in tools to measure distances, areas, and volumes - no need for extra software. Whether you’re calculating stockpile volumes or assessing material quantities, these tools offer the precision needed for accurate inventory management. You can also annotate models to flag hazards, document irregularities, or add notes for better team collaboration. Features like the "3D Inspector" and "2D Inspector" panes make it easy to mark up models before sharing. The before-and-after view is particularly helpful for tracking maintenance progress or structural changes over time.
These tools not only streamline project workflows but also set the stage for secure and flexible sharing options.
Secure Sharing and Integration
Anvil Labs makes sharing projects simple and secure. You can use password-protected links and set user-specific access controls, ensuring that only authorized team members can view your models - right from any modern browser. Share entire project galleries or specific files, depending on what stakeholders need. Encryption safeguards your data throughout the process.
"The per project pricing makes it easy for me to bill customers. It's too arbitrary to predict the cost to customer with Agisoft or Pix4D's cloud costs."
– Connor Barnes, Leading Edge Environmental and Emergency Services
For client presentations, the customizable portfolio feature lets you organize multiple industrial assets into a branded, professional gallery. You can also enable multi-factor authentication for added security on sensitive projects. Plus, Anvil Labs integrates seamlessly with AI analysis tools and task management workflows, making it a versatile choice for complex operations.
Conclusion
Creating 3D models of industrial equipment with drones involves a straightforward five-step process: selecting RTK drones and the right support gear, planning flights with a 75% image overlap, capturing high-resolution photos, processing the data with photogrammetry software, and refining the results using ground control points (GCPs) for improved accuracy. This approach not only ensures precise models but also prepares your data for smooth integration into collaborative tools.
These 3D models bring value to a range of industries, offering applications like accurate stockpile volume measurements, early hazard identification, and progress tracking that helps projects stay on time and within budget. The key to achieving reliable results lies in maintaining adequate image overlap and employing GCPs for precise georeferencing.
Once the model is complete, Anvil Labs simplifies project workflows by offering integrated features such as asset hosting, annotation, measurement tools, and secure sharing. Teams can easily review models through any browser, take precise measurements, flag hazards, and collaborate effectively. By incorporating these refined models into Anvil Labs, teams can move seamlessly from data collection to actionable insights.
FAQs
What are the advantages of using RTK-enabled drones for creating 3D models of industrial equipment?
RTK-enabled drones deliver centimeter-level precision, making them perfect for generating highly accurate 3D models of industrial equipment. These drones can collect data up to five times faster than traditional ground surveys, cutting down on labor needs and reducing overall project expenses.
With their ability to simplify workflows and improve accuracy, RTK-enabled drones are transforming industries that depend on precise spatial analysis and efficient project management.
How do Ground Control Points (GCPs) improve the accuracy of drone-based 3D models?
Ground Control Points (GCPs) are precisely measured reference markers used to tie drone imagery to real-world coordinates. This step is key to achieving high accuracy in 3D models. By integrating GCPs into your photogrammetry process, you can dramatically cut down positional errors and improve the overall reliability of your models.
These markers serve as anchors for your dataset, locking it to specific ground locations and reducing the drift often caused by standard GPS systems. With GCPs, horizontal and vertical errors can be minimized to just a few centimeters. They also play a critical role in validating and correcting data during processing, ensuring accurate elevation measurements and acting as a quality control measure for your final output. This level of precision is crucial for industries like construction, asset management, and documenting industrial sites.
How does photogrammetry software transform drone data into 3D models?
Photogrammetry software takes overlapping images captured by drones and transforms them into point clouds and textured 3D meshes. The result? Highly detailed digital replicas, often referred to as digital twins, perfect for in-depth analysis and visualization.
By combining multiple images, the software pulls out precise spatial data to create realistic 3D models of industrial equipment. These models prove incredibly useful for tasks like monitoring equipment, planning spatial layouts, and managing sites efficiently.
