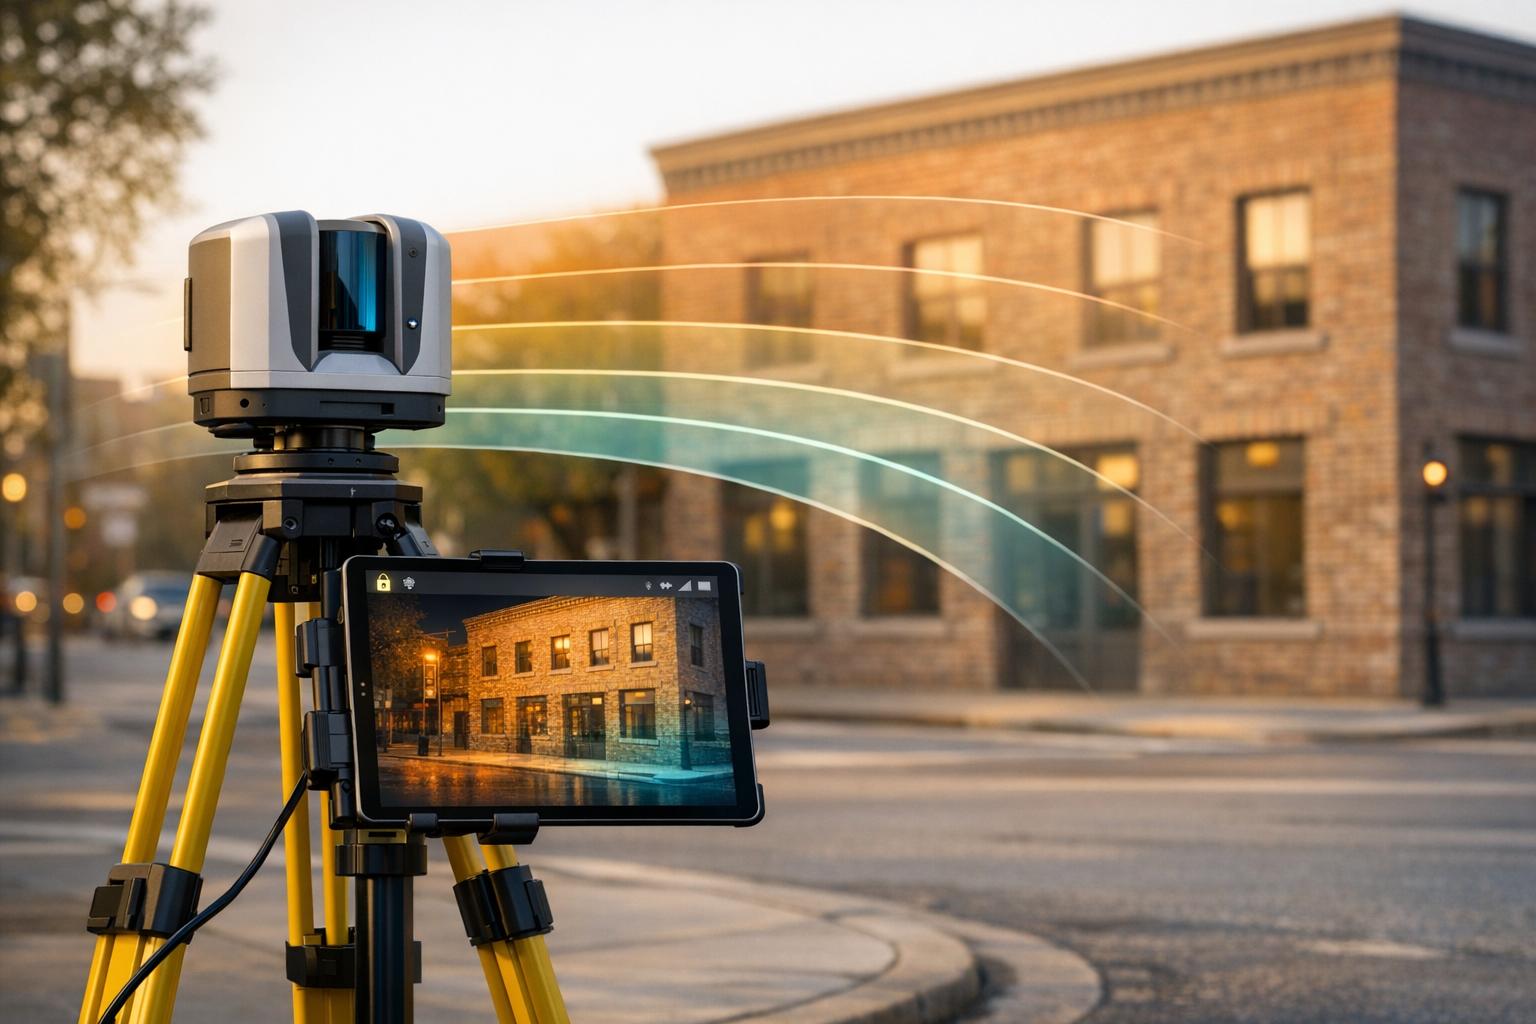
Real-time LiDAR processing is about turning raw laser scan data into actionable insights on the spot. This article breaks down how to achieve accurate and efficient workflows, from equipment setup to secure data management. Key takeaways include:
- Preparation Matters: Ensure sensor calibration, coordinate systems, and metadata are correctly configured to avoid errors later.
- Data Collection Tips: Plan for full site coverage and account for weather, lighting, and environmental conditions to maintain data quality.
- Processing Techniques: Use noise filtering, point cloud classification, and real-time accuracy checks to clean and validate data quickly.
- Output Creation: Convert point clouds into useful formats like 3D models or orthophotos for stakeholders, while ensuring precision.
- Data Management and Security: Use spatial tiling, compression, and strict access controls to handle large datasets securely and efficiently.
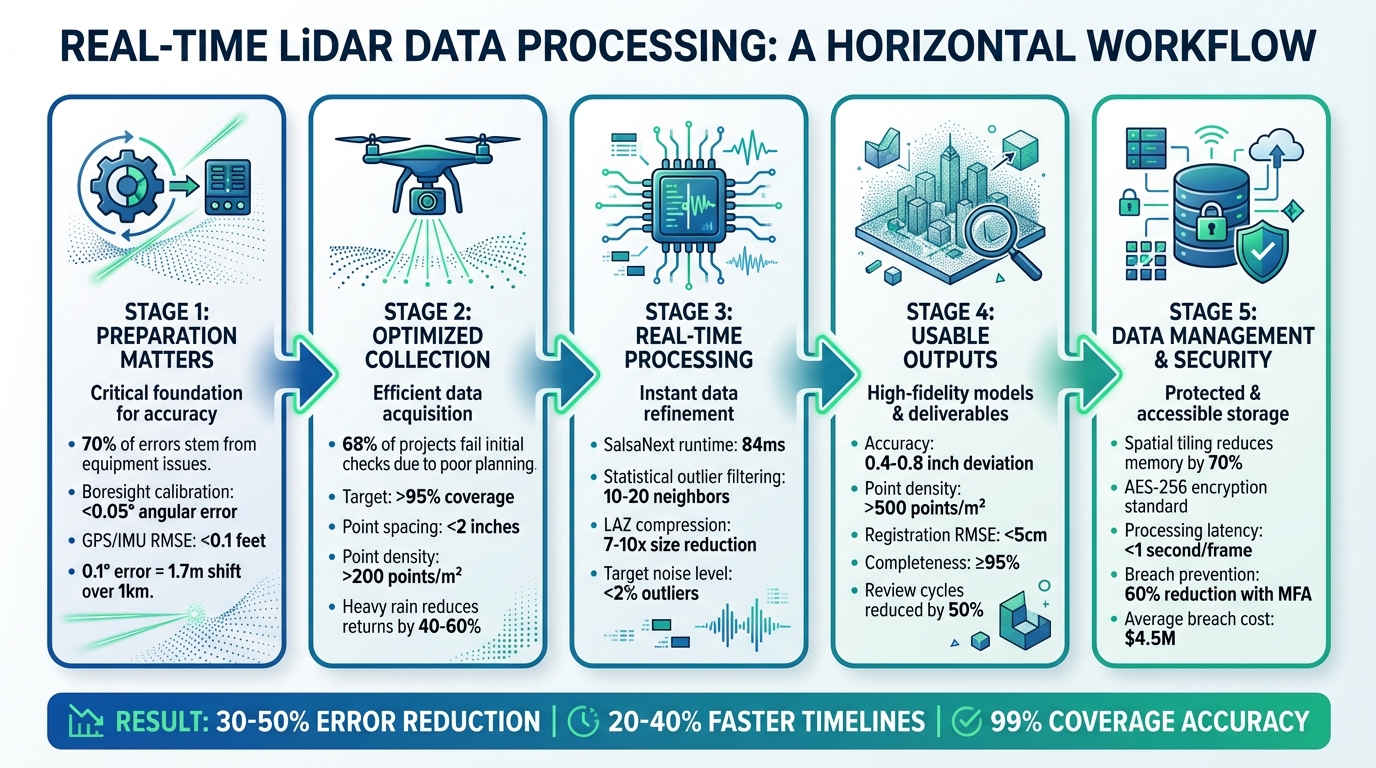
5-Stage Real-Time LiDAR Data Processing Workflow with Key Metrics
How To Process LiDAR Data (5 Step Process)
sbb-itb-ac6e058
Preparing for Real-Time LiDAR Data Processing
Getting everything set up correctly before collecting data can save you from processing nightmares later. Studies indicate that around 70% of LiDAR processing errors stem from equipment issues and coordinate mismatches - problems that can often be avoided with proper preparation.
Validate Equipment and Calibrations
Making sure your equipment is in good shape and properly calibrated is key to smooth real-time processing. Start by visually inspecting your LiDAR sensor for any signs of damage. Then, run a quick test scan on a known reference object to ensure the data return rate is above 98%.
Boresight calibration is another critical step. This ensures your LiDAR aligns perfectly with GNSS/IMU sensors. Even a small error of 0.1° can result in point cloud shifts of up to 1.7 meters over a 1-kilometer distance. Use the tools provided by the manufacturer to aim for an angular error of less than 0.05°. If you're using drones, double-check that the GPS/IMU integration works seamlessly with ground control points (GCPs) achieving an RMSE of less than 0.1 feet.
Before heading out, run a one-minute diagnostic scan in an open area. Power cycle the sensors and use diagnostic software like LiDAR360 or Terrasolid to verify performance. If you spot issues such as lens fogging or connection problems, address them immediately.
Configure Coordinate Systems and Metadata
Setting up the correct coordinate system from the start is crucial. Use NAD83 (2011) with NAVD88 and the GEOID18 model. For minimal distortion, opt for State Plane coordinates (in US feet).
Survey 5 to 10 evenly distributed GCPs across your site (approximately 1 square kilometer) with an accuracy of less than 0.07 feet. Import these GCPs into your system and perform a bundle adjustment for accurate real-time georeferencing.
Don't forget to embed metadata during setup. Include details like the sensor model, scan rate (100–500 kHz), timestamp (MM/DD/YYYY HH:MM:SS), and temperature in Fahrenheit. Tools like PDAL pipelines can automatically tag LAS files with this information, reducing alignment errors by up to 25%. Anvil Labs also supports data ingestion with built-in validation and native handling of imperial units, streamlining the process even further.
Optimizing LiDAR Data Collection
Once your equipment is calibrated and coordinate systems are set up, the next step is gathering data that’s ready for real-time processing. According to USGS guidelines, poor planning is the reason why 68% of LiDAR projects fail initial accuracy checks. Many issues like coverage gaps and poor data quality can be avoided with thoughtful planning and attention to environmental factors.
Plan Data Collection for Complete Coverage
Start by creating a detailed flight or ground scan plan using tools like Pix4Dcapture or DJI Pilot. Aim for over 95% coverage with point spacing under 2 inches. For industrial sites, a double-grid pattern works well - fly north–south passes first, then east–west at a slightly different altitude.
For example, on a 10-acre industrial site, you can fly at 100 ft altitude with 60 ft spacing for north–south passes, ensuring 30% overlap. Then, perform east–west passes at 80 ft altitude. Using a DJI Matrice 300 RTK, this approach can achieve full coverage in about 25 minutes. Not only does this method reduce data gaps by 40%, but it also achieves over 200 points per square meter.
For ground-based scans, divide the site into 165 ft grids with 10–15% overlap. Make sure lateral overlap between scan lines is around 20–40%. This overlap is crucial for accurate point cloud registration, especially when using algorithms like Iterative Closest Point (ICP). It can cut processing errors by 15–25% in dynamic environments. Test your plan in a simulation and involve field operators early in the process to help reduce rework by as much as 30%.
Once you’ve nailed down your coverage plans, it’s time to factor in environmental conditions to protect your data quality.
Account for Environmental Factors
After ensuring complete coverage, consider weather, lighting, and temperature to maintain reliable real-time data quality. Heavy rain can reduce LiDAR pulse returns by 40–60%, while dust or fog can weaken signal strength by up to 70% beyond 165 ft. Always check NOAA forecasts before heading out, and avoid scanning when wind speeds exceed 10 mph or if precipitation is over 0.1 inches per hour.
Plan scans during optimal times, like 6:00–9:00 AM or 4:00–7:00 PM, to minimize specular reflections and multipath errors. These time windows improve feature detection by about 20%. For instance, one construction site study showed that scanning at dawn reduced fog-related noise from 12% to just 2%.
Keep ambient temperatures below 95°F, and if you’re working in summer, include cooling breaks every 30 minutes to maintain sensor accuracy within 1 cm RMSE. In dusty environments, use IP65-rated LiDAR sensors like the Velodyne Puck paired with air filters, or schedule scans right after rain to minimize dust interference. Monitor your real-time dashboard for key metrics: point density (aim for above 100 points per square meter), coverage percentage (target 95% or higher), and noise levels (keep outliers below 2%). This helps you catch and address issues as they happen.
Real-Time Data Processing Techniques
After collecting LiDAR data under the best conditions, the next step is processing it in real time without compromising accuracy. Raw point clouds need immediate cleaning, classification, and validation to ensure reliable results.
Filter and Reduce Noise
Start by using statistical outlier filtering to eliminate random noise and points with low neighbor density. This method calculates the average distance of each point to its neighbors, flagging those that exceed a set standard deviation as noise. You can adjust the mean_k parameter (typically 10–20 neighbors) to control how aggressive the filtering is.
Once you've applied statistical filtering, classify the noise points by assigning them to LAS Class 7, then use expression filters to exclude these points from your final dataset. A hard-coded elevation filter is also helpful for removing points below -100 ft or above 500 ft. To handle large datasets efficiently, divide real-time data streams into smaller spatial tiles. This keeps the statistical filtering process manageable and avoids system crashes. Additionally, using compressed formats like LASzip or COPC (Cloud Optimized Point Cloud) minimizes the data size, making it easier to visualize and store downstream.
With noise out of the way, the next step is to classify and segment the cleaned data.
Classify and Segment Point Clouds
Once the data is cleaned, the next task is categorizing point clouds into features such as ground, vegetation, and buildings. For faster processing, projection-based methods like SalsaNext convert 3D point clouds into 2D range views, achieving low latency. On an NVIDIA Jetson AGX Orin, SalsaNext can deliver near real-time performance with a runtime of about 84ms (58ms for pre-processing and 26ms for inference). By comparison, point-based models like WaffleIron are significantly slower, taking 1,847ms on the same hardware - making them unsuitable for real-time applications.
To improve efficiency, implement CPU-GPU pipelining. This method overlaps pre-processing tasks with GPU inference, reducing overall system latency and increasing throughput. For use cases where accuracy is paramount, sparse convolution-based models like Minkowski are a strong option. These models take advantage of the sparse nature of LiDAR data to reduce memory usage, but they require hardware specifically designed for sparse tensor computations to perform effectively.
Once features are classified, the final step is verifying the processed data's accuracy.
Verify Accuracy in Real Time
Real-time accuracy checks are essential to avoid costly errors later. One useful method is cursor draping, which allows you to align the cursor to the LiDAR surface along the z-axis as it moves through 3D space. This provides an immediate visual check of surface alignment and elevation accuracy. Automated routines can also flag outliers and key features, such as curb tops or gutter bottoms, as they are processed.
"Digitizing in true 3-D stereo allows data to be collected more accurately, as stereo's fundamental ability to see the data from any viewpoint, origin or scale is critical to placing accurate points on the ground." - Jane Smith, Cardinal Systems
Rapid surface visualizations, such as contours, shaded relief, or TINs (Triangulated Irregular Networks), help identify potential errors quickly. For standard-sized projects, vertical accuracy can be verified by comparing real-time data with at least 20 independently surveyed checkpoints in flat, open terrain. According to ASPRS standards, 2-foot contour accuracy requires a 0.67-foot Root-Mean-Squared Error (RMSE), while 1-foot contour accuracy demands a 0.34-foot RMSE.
Converting LiDAR Data into Usable Outputs
Create Visualizations and Models
Once point clouds are verified, they can be transformed into formats that are ready for stakeholders. To align multiple scans, ICP (Iterative Closest Point) algorithms ensure seamless integration. Afterward, voxel grid downsampling (e.g., 0.1 m/4 in voxel size for urban areas) reduces density while keeping important details intact.
For smoother, more shareable visuals, Poisson surface reconstruction can convert point clouds into continuous surfaces. If RGB data is available, texturing the mesh adds a photorealistic touch. These detailed meshes can then be imported into platforms like Unity or Unreal Engine to create interactive digital twins. With these, stakeholders can virtually explore sites and measure deviations to sub-inch accuracy (around 0.4–0.8 in).
Some common visualization outputs include:
- Colored height maps: Ideal for tasks like 6-inch cut/fill analysis.
- Orthophoto mosaics: Useful for tracking site progress.
- Exploded assembly views: Perfect for asset inspections.
For processing and visualization, tools like CloudCompare offer free options for meshing and rendering, while the Point Cloud Library (PCL) enables real-time processing. For example, octree-based filtering in PCL can render point clouds with millions of points in under a second on standard hardware.
Quality checks are critical to ensure reliable outputs. Aim for:
- Point cloud density of over 500 points/m² (46 points/ft²).
- RMSE for registration below 5 cm.
- Completeness ratio of at least 95% of the surveyed area.
Validate these metrics against ground control points using software like Leica Cyclone to achieve precision within sub-inch levels. These refined outputs are essential for enabling real-time collaboration among teams.
Use Interactive Collaboration Tools
Sharing LiDAR outputs effectively can streamline teamwork. Platforms like Anvil Labs simplify managing and sharing data, including 3D models, orthomosaics, and thermal imagery. They automatically generate interactive 3D viewers with measurement tools (e.g., for distances and cubic volume) and annotation features. This eliminates the need for specialized software and allows teams to tag issues directly within the point cloud.
Organizing data into project folders with role-based access ensures better control. For example, clients can be given view-only permissions, while internal teams retain editing rights. AES-256 encryption protects data both at rest and in transit, while audit logs track access. For U.S. industrial sites managing sensitive infrastructure data, compliance with standards like FedRAMP enhances security further.
Interactive features like real-time annotations and multi-user comments can cut review cycles by up to 50%. Instead of exchanging screenshots, teams can draw polygons directly onto point clouds to highlight defects or alignment issues. These annotations can even integrate with task management systems, automatically generating tickets for field crews to address. Cross-device viewers, accessible via web or mobile, allow maintenance teams to use annotated thermal-LiDAR overlays on tablets, helping them prioritize on-site repairs.
Managing and Securing Real-Time LiDAR Data
Once data collection and processing are optimized, the next step is managing and securing that data effectively.
Implement Efficient Data Management Practices
Real-time LiDAR workflows can churn out massive amounts of data - over 1 TB per hour during urban scans. Without proper management, this can lead to serious bottlenecks. One effective strategy is spatial tiling, which divides point clouds into grid sections (e.g., 328 ft x 328 ft). This method supports parallel processing and selective loading, significantly reducing memory usage. For example, NVIDIA's CUDA-based tiling reduces memory demands by 70% in real-time streams, making it possible for drone surveys to handle large datasets without overwhelming hardware resources.
Compression plays a crucial role as well. Using the LAZ format, file sizes can be reduced by 7 to 10 times compared to raw LAS files. In Q1 2024, the California Department of Transportation (Caltrans) applied tiling and LAZ compression to manage 500 TB of real-time highway LiDAR data. This approach not only saved costs but also enabled secure sharing among 200 engineers using role-based access control. Under the leadership of GIS Director Maria Lopez, the project achieved 40% faster real-time analysis without a single security breach [Esri Case Study, April 2024].
Metadata organization is another key component. Standardized LAS 1.4 formats should include timestamps (MM/DD/YYYY HH:MM AM/PM), georeference data (in US feet or meters), intensity values, and calibration details. Relational databases like PostgreSQL with the PostGIS extension can speed up queries, cutting retrieval times from minutes to seconds - a method endorsed in USGS LiDAR guidelines. Platforms such as Anvil Labs further simplify this process by offering LiDAR tiling, asset hosting, and metadata organization, ensuring secure and seamless cross-device access for industrial applications.
Once data is efficiently managed, the focus shifts to protecting it with robust security measures.
Maintain Data Security and Access Control
To safeguard real-time LiDAR data, layered security measures are essential. Start with role-based access control (RBAC) to define user roles, such as viewer (read-only access), editor (metadata updates), and admin (full access). Applying the least-privilege principle ensures that users only access what they need - for instance, field engineers view raw data in imperial units, while executives access aggregated models. This approach successfully prevented unauthorized edits during a 2025 US highway project. Pair RBAC with AES-256 encryption for data at rest and TLS 1.3 for data in transit to meet standards like FIPS 140-2.
For collaborative environments, secure sharing protocols are vital. Use OAuth 2.0 with JWT tokens for API access and signed URLs with expiration windows (e.g., 24 hours) for temporary sharing. Adding multi-factor authentication (MFA) provides an extra layer of security, while audit logs monitor every access event in real time. According to a 2024 survey, 25% of LiDAR breaches were caused by weak access controls, with an average cost of $4.5 million per incident (IBM Cost of Data Breach Report). Real-time verification reduced such incidents by 60% in autonomous vehicle testing.
Anvil Labs incorporates these security features directly into its platform, offering secure data sharing options with customizable access controls, AES-256 encryption, and detailed audit logs. The platform supports LiDAR data alongside 3D models, thermal imagery, and orthomosaics, allowing teams to collaborate securely across devices while adhering to US regulations like CUI markings for industrial sites.
Conclusion
Processing LiDAR data in real time requires careful planning and execution to ensure dependable results. Start with a solid foundation: proper calibration, accurate coordinate setup, and thoughtful coverage planning. During processing, focus on noise filtering, point cloud classification, and real-time accuracy checks. These steps can significantly cut down errors - by as much as 30-50% in dynamic settings like autonomous vehicle mapping, where unfiltered noise often leads to costly misalignments.
Once the data is processed, turning it into usable outputs is essential. Automated segmentation can shrink processing times from hours to minutes, while optimized workflows help avoid manual bottlenecks. For example, construction teams using these methods achieved 99% coverage accuracy, saving over $100,000 by preventing rework.
Effective data management and strong security protocols are equally critical. Techniques like spatial tiling, compression, and controlled access have led to 20-40% faster project timelines by enabling iterative checks and early detection of defects.
To maintain and enhance these practices, review and refine them monthly, incorporating new insights as they arise. Set clear metrics for success, such as keeping processing latency under 1 second per frame and achieving point cloud accuracy above 95%, to measure progress effectively. Tools like Anvil Labs can support these goals by offering secure collaboration features for LiDAR data sharing, 3D modeling, and real-time verification across devices - all without compromising data security.
FAQs
What hardware setup do I need for real-time LiDAR processing?
For real-time LiDAR processing, ensure your system runs a 64-bit version of Windows 10 or 11. You'll need at least 64 GB of RAM, an NVIDIA GeForce RTX 20 series or better GPU with OpenGL 4.6 support, and a CPU with a base clock speed of 4 GHz or higher. Additionally, using a solid-state drive (SSD) is recommended to enhance storage efficiency and overall performance.
How do I keep point clouds accurate while processing live?
To ensure accurate LiDAR point clouds during live data collection, it's essential to follow a few best practices:
- Regular validation and calibration: Consistently check and adjust the sensors to maintain precision throughout the process.
- Use Ground Control Points (GCPs): These help improve geolocation accuracy, anchoring the data to real-world coordinates.
- Calibrate sensors before and during collection: This minimizes errors and ensures consistency in the captured data.
- Maintain stable flight patterns: Avoid sudden movements or irregular paths that could distort the data.
- Assess site conditions: Be aware of obstacles, weather, and other factors that could disrupt data quality.
By sticking to these steps, you can keep your point clouds accurate and reliable during real-time workflows.
How should I store and share real-time LiDAR data securely?
To safely store and share real-time LiDAR data, start by using scalable cloud storage. This ensures both flexibility and strong data protection. To minimize storage requirements, apply data compression techniques. Organize your files with geospatial indexing to make retrieval faster and more efficient.
When it comes to sharing, secure access controls are a must. Options like password protection or encryption can help prevent unauthorized access. Additionally, using distributed systems can improve both scalability and processing speeds, making it easier to manage large datasets effectively.
